News

< Back to News

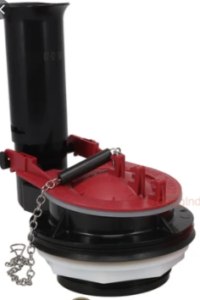
How Often To Replace Toilet Flapper

Toilet flappers usually last for about 3 to 5 years, but the lifespan can vary depending on factors such as the quality of the flapper, the water quality, and the frequency of use. Here are some signs that it may be time to replace your toilet flapper:

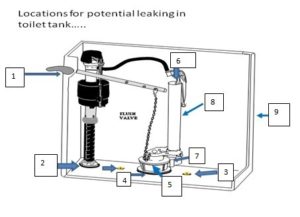
Continuous running of the toilet: If your toilet continues to run after flushing, it could be a sign that the flapper is worn out or damaged.

Water leaks: If you notice water leaking from the tank into the bowl, it could be a sign that the flapper is not sealing properly.

Buildup of mineral deposits: If you have hard water, mineral deposits can build up on the flapper, causing it to become stiff and less effective at sealing the flush valve.

Age: If you can’t remember when you last replaced the flapper or if it has been several years, it is a good idea to replace it as part of regular maintenance.

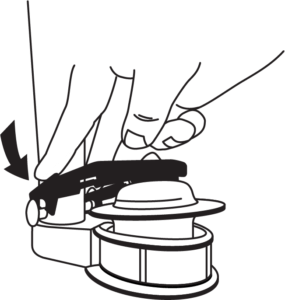
In general, it is a good idea to inspect your toilet flapper periodically and replace it if you notice any signs of wear or damage. Replacing a worn or damaged flapper can help you save water and reduce the risk of costly leaks and repairs.

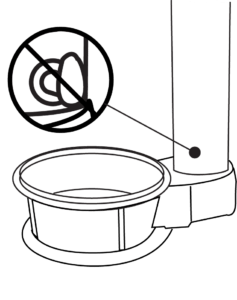
Very often, drop-in bleach tablets will damage a flapper causing it to leak. That is because the bleach is constantly in the toilet tank thereby damaging the flapper and other toilet parts. A better option would be to use Fluidmaster Flush ‘N Sparkle automatic toilet cleaner that does not damage toilet parts.

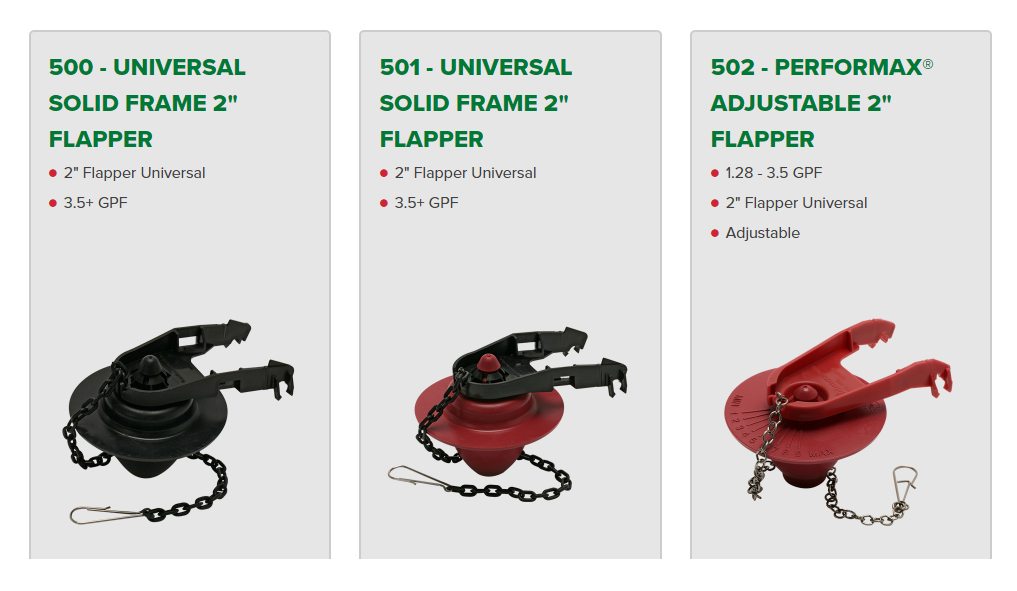
Click here to view our complete line of Toilet Flappers

News

< Back to News

What to use when replacing & installing a toilet

Fluidmaster’s K-7530-5000 Better Than Wax, SetFast, Secure Cap, Click Seal Toilet Installation Kit is the easiest solution to reset, and reseal your toilet bowl-to-floor fast. Included are some of Fluidmaster’s most innovative designs for a simple and fast install. The Better Than Wax, Waxless Toilet Seal eliminates messy wax for a hassle free install. Unlike wax it can be repositioned and plunging won’t affect performance. SetFast Closet Toilet Bolts offer a quick and simple solution for attaching your toilet bowl-to-flange. This design eliminates breaking off, or cutting of toilet bolts with a self-adjusting feature. Simply twist to adjust up, or down to fit your toilet. Secure Cap Toilet Bolt Caps are a universal toilet bolt cap. With the same clean white finish, but securely screws on to eliminate coming off, and sealing water-tight. The durable Click Seal Toilet Connector features highly flexible braided stainless steel construction to resist kinks, or creases. With Click Seal and audible click let’s your know it’s sealed just like a gas cap.

This Toilet Installation Kit can be purchased directly from Fluidmaster at: Shop Fluidmaster

Here is a video on how to replace and install a toilet using Fluidmaster’s Toilet Installation Kit:

To download our free guide to fix common toilet problems please click here: Fluidmaster Toilet Repair Guide

News

< Back to News

Protect your toilet parts with Automatic Toilet Cleaner

“I didn’t know my toilet could look this good without scrubbing”….says an independent review of Flush ‘n Sparkle on Architectural Digest

Bob Vila, Home Improvement Expert, independently recommends Fluidmaster’s Flush ‘n Sparkle automatic toilet cleaner. Click here to read what Bob Vila had to say: Bob Vila Article

Fluidmaster has compiled a list of Frequently Asked Questions on Flush ‘n Sparkle.

Q: By switching to Flush ‘n Sparkle from a drop-in bleach tablet, approx. how many years can a customer extend the average life of a flapper or any other toilet part?

A: Most of Fluidmaster’s fill valves, flappers and flush valves have 5-7 year warranty and typically last beyond these years when not exposed to the harmful effects of drop-in bleach tablets.  Drop-in bleach tablets can degrade these toilet parts so they do not function properly (e.g., seal leaks) within a year or two.  In a worst case scenario, drop-in bleach tablets can cause a fill valve failure with the ensuing water leak damage requiring high cost repairs.

Q: How long would it take for the bleach to dissipate from the toilet bowl so that the toilet bowl water would be safe for kids and pets? 

A: Chlorine will kill bacteria such as E. coli in less than a minute, but takes around 16 minutes to kill the hepatitis A virus. It needs 45 minutes to kill Giardia, and up to 10 days to kill Cryptosporidium. So the question becomes, is the potential presence of bacteria, germs, and viruses in the toilet bowl water safe for kids and pets? Conceivably, an acceptable level of chlorine concentration is perhaps desired to be around for as long as possible to keep the toilet bowl water free of harmful microorganisms.   Well, this is why swimming pools require a constant level of chlorine in the water at all times.

Q: How much is the bleach concentration in Flush ‘n Sparkle compared to a drop-in bleach tablet?

A: Drop-in bleach tablets are basically the same chemical product as Flush ‘n Sparkle but comes in a larger amount and are placed directly in the toilet tank water.  The toilet tank water may build up high chlorine concentration levels with infrequent flushing.  When flushed, most of the chlorinated toilet tank water goes down the drain with the waste.  The small amount of chlorinated water remaining in the toilet bowl trap immediately after the flush is diluted with supplied refill water from the fill valve for the toilet bowl water level reset.  The resulting toilet bowl water may have about the same amount of chlorine concentration as compared to the same toilet equipped with the Flush ‘n Sparkle system.

Q: Does the bleach in Flush ‘n Sparkle affect sewer systems and is it environmentally as safe as a drop-in bleach tablet?

A: If drop-in bleach tablet use can be accepted as being environmentally safe, then the amount of chlorine dispensed from the Flush ‘n Sparkle system is just as safe, if not more so.  People with a septic tank sewage system are the ones most concerned about using chlorine with toilet flushing.  The Flush ‘n Sparkle system releases an acceptable amount of chlorine concentration that resides in the toilet bowl to keep the bowl water germ free.  By the time the Flush ‘n Sparkle bowl water is flushed with waste down the drain, much if not all of the chlorine concentration has dissipated. In contrast, most of the drop-in bleach tablet toilet tank chlorinated water goes down the drain with the waste at the time the toilet is flushed.  As such, a toilet with the drop-in tablet would expose the septic tank sewage system with a much higher dosage of chlorine concentration per flush as compared to the same toilet using the Flush ‘n Sparkle chlorine dispensing system.

You can now schedule your order for refills from Fluidmaster at your desired time frame when you purchase the system. Watch the video below or click on this link to learn about the steps on how to schedule your refill orders: Schedule Refill Orders

To download our free guide to fix common toilet problems please click here: Fluidmaster Toilet Repair Guide

News

< Back to News

How to Replace a Toilet Flapper

Toilet flappers are the leading cause of leaking or running toilets – they provide the seal for the flush valve and control the volume of water released to the bowl. Flappers wear out more often if you use drop-in bleach tablets. Instead use Flush ‘n Sparkle™ Self-Cleaning Toilet System and protect your flapper.

Installing Toilet Flapper Using Mounting Pins

Most toilet flappers are attached to the overflow pipe by snapping the flapper clips over two mounting posts on each side of the overflow pipe (see diagrams)

  • To remove the existing flapper, first turn off the water to the toilet and flush toilet tank emptying most of the water.
  • Undo chain clip from tank lever arm at top of tank.

Gently pull flapper arms up until the flapper clips have unclamped from mounting posts.

  • To install new flapper, align new flapper clips over mounting pins and gently push down until they snap into place.

  • Draw chain up to tank lever and using chain clip, attach to tank lever arm, threading clip into one of the lever arm holes. Tip-attach chain lip to tank lever directly above flapper and leave 1/2 inch of slack in chain.

  • Turn water back on to toilet. Once filled, flush the tank to check flapper is operating correctly.

Installing Toilet Flapper Using Pipe Adaptor Ring

When the flush valve does not have mounting posts a pipe adaptor must be used. Fluidmaster has “Flexible Frame” flappers that have a pipe adaptor molded onto the frame.

• To remove existing flapper first turn off the water to the toilet and flush toilet tank emptying most of the water.

• Undo chain clip from tank lever arm at top of tank

  • To remove existing flapper, gently pull flapper up sliding it off the overflow pipe.

1A) Installing a flapper to an overflow pipe without Mounting Posts

1B) Insert ring around the overflow pipe and push the flapper all the way down the pipe so that it sits flush on the seat.

• Draw chain up to tank lever and using chain clip attach to tank lever arm threading clip into one of the tank lever arm holes. Tip – Attach chain clip to tank lever directly above flapper and leave ½ inch of slack in chain.

  • Turn water back on to the toilet, once filled, flush the tank to check if the flapper is operating correctly.

If you are unsure if your toilet needs a 2″ or 3″ flapper, please click here: Determine size of toilet flapper

Here is the installation video of our 502 toilet flapper that will help you see visually how easy it can be to replace your flapper:

To download our free guide to fix common toilet problems please click here: Fluidmaster Toilet Repair Guide

News

< Back to News

Determining Whether You Have a 2" or 3" Flush Valve and Flapper

One of the biggest challenge to finding the right flapper for your toilet is to determine which size of flapper will fit your toilet. Most toilets will have a 2-inch drain or a 3-inch drain. Fluidmaster manufactures a standard or universal size of flush valves with flappers and are among the most common flush valves to be used. All though there are many different types of flush valves most flush valves are interchangeable and depend on the size of the ceramic flush hole that is bored through the tank by the porcelain manufacturer.

Fluidmaster’s Flush Valves use flappers to connect to the flush valve and can be easily replaced by snapping them off and on to the flush valve. These flappers are labeled as 2 inch or 3 inch for their corresponding flush valve size to make it easier for you to select the correct flapper.

The simplest way to determine which Fluidmaster flush valve and flapper to use is to measure the flapper that is already on the flush valve. To identify what size is needed measure the width of the flapper from end to end. If the flapper measures 3 inches across select a 2 inch flapper (like the 502 Fluidmaster model) if the flapper measures 4 inches across select a 3 inch flapper (like the 5403 Fluidmaster model).

Fluidmaster toilet flapper
Fluidmaster Flapper

The 507AK – 2″ Flush Valve comes with the 2″ 502 Flapper:

Toilet Flush Valve
Fluidmaster Toilet Flush Valve

The 540AKR – 3′ Flush Valve comes with the 3″ 5403 Flapper:

Flush Valve for Toilets
Fluidmaster Flush Valve

To view the entire range of Fluidmaster Flappers, please click here: Fluidmaster Toilet Flappers

To solve ALL your toilet problems, consider either the 2″ Everything Toilet Repair Kit or if you have a 3″ flush and flapper consider the 3″ Everything Toilet Repair Kit

To download our free guide to fix common toilet problems please click here: Fluidmaster Toilet Repair Guide


News

< Back to News

Toilet Bowl will not fill after the Flush

Toilets that do not refill the bowl after the flush are mainly a fill valve issue. Here are some simple solutions that you can try to fix this problem.

  1. Check that the refill tube is attached to the top of the overflow pipe
  2. Check Bowl Refill adjustments are set properly for water dispensing into bowl after a flush
  3. Flushing Debris from fill valve
  4. Replace / repair the fill valve

 A. The Refill Tube delivers water directly to the toilet bowl with every flush. Make sure the tube is dispensing water directly into the overflow pipe. The refill tube needs to be set on a clip set above the pipe and not shoved directly inside the pipe or a siphon will occur, causing the toilet to turn on and off like a ghost flush.

B) The Fluidmaster 400H-002 fill valve has a Bowl Refill Knob that lets more or less water go into the bowl – if you are using a 400H-002 from Fluidmaster make sure this adjustment is set properly.


C. Flushing debris from your water supply and fill valve:

D) Replacement Parts recommended for U.S. Customers:

Replacement Valves recommended for U.S. Customers:

Replacement Parts recommended for Canadian Customers:

Replacement Valves recommended for Canadian Customers:

To download our free guide to fix common toilet problems please click here: Fluidmaster Toilet Repair Guide

News

< Back to News

Toilet Running Constantly

When your toilet keeps running water or is constantly running, we must first find out if you have a fill valve issue or a flapper/flush valve issue.

Step 1 – If you have shut off the water supply line, then turn on water and look inside the tank. Determine if the water level is rising so high it is draining into the overflow pipe. If the answer is yes then follow the steps for cleaning the fill valve.

Step 1A – If flushing debris (Cleaning Solution) does not resolve the issue; Replace the fill valve. We recommend installing the 400H PerforMAX toilet fill valve.

Flushing Debris (Cleaning Solution):

It is possible for dirt and debris to lodge itself inside the valve. This can happen any time the water is on and may happen after a new installation, a few days later or even months and years after installation.

Follow these steps to clean the valve:

Turn off water and flush the toilet.

Reach into the tank with your right hand and lift up the float cup and grip the gray shaft and hold it in that position (see photo below).

Fix Running Toilet

With your left hand grab the cap and at the same time place your thumb on the side of the plastic arm.

Twist both the cap and plastic arm counterclockwise 1/8th turn. Press down on the cap while making a quick twisting motion.

Lift up on cap and move away from top of valve body. Using a cup hold the cup upside down over the exposed opening of the valve and turn on the water supply full force for 10-15 seconds. Look inside valve to ensure no debris is left inside the valve.

Reverse steps to place top back on the valve. Turn on water and flush toilet to ensure problem has been resolved.

Video: How to Fix a Running toilet

If this procedure does not resolve the issue then replacing the fill valve should resolve the issue. We recommend using the 400H PerforMAX toilet fill valve.

Step 2 –With the tank full of water turn off the water to the toilet and mark the current water level inside the tank. Wait a period of time 10-15 minutes and note if the water is draining down from your mark. If it drains down replace the flapper first as this is the most common problem. To determine whether you need a 2″ or 3″ flapper, please click here: Determine size of flapper

If you need a 2″ toilet flapper, we recommend the 502 toilet flapper

If you need a 3″ toilet flapper, we recommend either the 513A toilet flapper or the 5403 toilet flapper

Step 3– If you replace the flapper and the toilet continues to drain down (repeat step 2 if necessary) then we recommend replacing the flush valve as this will ultimately stop the constant draining of water from the tank to the bowl. We recommend the K-507A-008 flush valve if you have a 2″ toilet or the 540AKR flush valve if you have a 3″ toilet. To view all the flush valves, please click here: Flush Valves

Step 4 – If at any time the toilet keeps running water and you see water on the floor immediately turn off water and look inside the tank to see if the water is coming from the lid or tank lever area. Replace fill valve and replace flush valve. The flush valve is set to the wrong height or may be blocking the path of the water to drain safely into the toilet bowl.  If water is draining down and water is coming out from the bottom of the tank change tank bolts and washers.

If you need to replace any of the toilet parts, why not get Fluidmaster’s Everything Kit includes everything you need to fix your toilet in one purchase?

If you are in the U.S. and have a 2″ flush valve toilet, we recommend the 2″ Everything Kit

If you are in the U.S. and have a 3″ flush valve toilet, we recommend the 3″ Everything Kit

If you are in Canada and have a 2″ flush valve toilet, we recommend the 2″ Everything Kit

If you are in Canada and have a 3″ flush valve toilet, we recommend both the 540AKR Flush Valve and the 400H Fill Valve

To download our free guide to fix common toilet problems please click here: Fluidmaster Toilet Repair Guide

News

< Back to News

How to install a Toilet Flapper

Installing flapper using Mounting Pin:

Most toilet flappers are attached to the overflow pipe by snapping the flapper clips  over two mounting posts on each side of the overflow pipe (See diagrams)


  • To remove existing flapper first turn off the water to the toilet and flush toilet tank emptying most of the water.
  • Undo chain clip from tank lever arm at top of tank

Gently pull flapper arms up until the flapper clips have unclamped from mounting posts.

  • To Install new flapper align new flapper clips over mounting pins and gently push down until they snap into place.

  • Draw chain up to tank lever and using chain clip attach to tank lever arm threading clip into one of the lever arm holes. Tip – Attach chain clip to tank lever directly above flapper and leave ½ inch of slack in chain.

  • Turn water back on to toilet, once filled flush the tank to check flapper operation.

Installing flapper using pipe adaptor ring:

When the flush valve does not have mounting posts a pipe adaptor must be used. Fluidmaster has “Flexible Frame” flappers that have a pipe adaptor molded onto the frame.

  • To remove existing flapper first turn off the water to the toilet and flush toilet tank emptying most of the water.
  • Undo chain clip from tank lever arm at top of tank

  • To remove existing flapper gently pull flapper up sliding it off the overflow pipe.

1) Installing a flapper to an overflow pipe without Mounting Posts.

2) Insert ring around the overflow pipe and push the flapper all the way down the pipe so that it sits flush on the seat.

  • Draw chain up to tank lever and using chain clip attach to tank lever arm threading clip into one of the tank lever arm holes. Tip – Attach chain clip to tank lever directly above flapper and leave ½ inch of slack in chain.

  • Turn water back on to toilet, once filled flush the tank to check flapper operation.


You can watch this video to see how to replace your flapper:


To download our free guide to fix common toilet problems please click here: Fluidmaster Toilet Repair Guide

News

< Back to News

How to check your toilet's flush volume

Knowing how much your toilet flushes and which valves to use with them can be a complicated business. This article will help determine what valves are best used with your toilets. The easiest way to determine a toilet gallon per flush volume and which valve to use is by looking at the date of the toilet and looking at your toilets flush valve system. Use this date method to find the parts recommended.

  • Pre – 1994
  • 1994 – Present
  • 2005 – Present (HET- High Efficiency Toilets)

Pre-1994 Toilets Water Saving and older toilets:

Toilets that date prior to 1994 fall in to two main flush volumes: 5-7 gallon per flush (gpf) and 3.5 gallons per flush (gpf). In these toilets, Fluidmaster recommends using our Standard or Leak Prevention Fill Valves (400A or 400A with Brass Shank  or 400LSR) and a 2 inch (Non-Adjustable) Flappers (models include 500, 501, 503, 504).

1994  to 2006 Toilets:

Toilets that are dated 1994 to present time fall into two main flush volumes, 1.6 and 1.28 gallons per flush.

In these toilets, Fluidmaster recommends using both our High Performance Fill Valves (Model 400AH) or (Model 400H) our PerforMax® and Water Savings (Adjustable) Flappers both in 2 and 3 inch (sizing) categories (models include 502, 5051 and 5403).

2005 – Present (High Efficiency Toilets):

Toilets that are dated 2005 to present time fall into two main flush volumes, 1.28 and lower gallons per flush.

In these toilets,  Fluidmaster recommends using both our High Performance Fill Valves (Model 400AH) or (Model 400H)–  PerforMax® and Water Savings (Adjustable) Flappers – both 2 and 3 inch (sizing) categories –  3 inch Flush Valve (model 540AKR).

HET is an abbreviation for High Efficiency Toilet. These toilets have flush volumes that are less than the standard 1.6 gallon per flush toilet. These toilets need a higher refill rate when refilling the toilet bowl and may come with a larger than standard 2 inch flush valve drain.

Flush valves can be designed as Dual Flush, Tower Flush, 2 inch and 3 inch Flush Valve Drains.

  • Dual Flush valves can alternate the flush volume from a full flush (standard flush volume of 1.6 or less) to a partial flush (less than standard full flush). Fluidmaster  has a Dual Flush which converts “any” standard flush to an alternating flush using our dual flush technology (models 550DFRK & 550DFR)
  • Tower flush valves are valves that normally are 1 piece in design and the entire flush valve drain lifts up to release the water.
  • 2 inch and 3 inch Flush Valves are valves that flush using a flapper valve to release the water. The designation 2 inch and 3 inch describe the drain opening along with the corresponding size of the flapper that covers the drain opening. If you are unsure whether you have a 2″ or 3″ flush valve, please click here: Determine size of flush valve

To see list of valves or kits that we recommend follow these links:

Fill Valves

Flappers

Repair Kits

Flush Valves

If you need to replace any of the toilet parts, why not get Fluidmaster’s Everything Kit includes everything you need to fix your toilet in one purchase?

If you are in the U.S. and have a 2″ flush valve toilet, we recommend the 2″ Everything Kit

If you are in the U.S. and have a 3″ flush valve toilet, we recommend the 3″ Everything Kit

If you are in Canada and have a 2″ flush valve toilet, we recommend the 2″ Everything Kit

If you are in Canada and have a 3″ flush valve toilet, we recommend both the 540AKR Flush Valve and the 400H Fill Valve

To download our free guide to fix common toilet problems please click here: Fluidmaster Toilet Repair Guide

News

< Back to News

Easy toilet installation with Wax-free seal

Are you tired of dealing with messy, difficult-to-install wax seals every time you need to replace or repair your toilet? Say goodbye to that hassle and hello to easy toilet installation with Fluidmaster’s wax-free seal!

Our innovative seal features a flexible rubber design that eliminates the need for wax, making installation quick and mess-free. Not only that, but it also provides a superior seal, ensuring your toilet stays leak-free and in top condition for years to come.

With Fluidmaster’s wax-free seal, you’ll save time and effort during installation and enjoy peace of mind knowing your toilet is protected from leaks. So why not make your next toilet installation a breeze with Fluidmaster’s wax-free seal?

Better Than Wax® seals takes the mess and hassle out of toilet installation.

  • No wax, No mess
  • Can be Repositioned
  • Plunging Won’t Cause Leaks
  • Fits any flange, any toilet
  • No-rust brass bolts & hardware included
  • Seals on uneven floors or over tile floors with recessed flanges
  • 10-Year Warranty

Watch this video for a hassle-free and mess-free toilet installation:

If you would prefer to buy a Toilet Installation kit directly from Fluidmaster, please click here: Shop Fluidmaster

Here is a video on all the tools you will need to replace or install a toilet:

To download our free guide to fix common toilet problems please click here: Fluidmaster Toilet Repair Guide

News

< Back to News

How to install / Adjust a Leak Sentry Valve

This article will cover how to adjust the Leak Sentry Device if your tank does not refill after flushing.

Read below to:

1. Get instructions on how to adjust the Leak Sentry/Leak Guard or watch the Installation Video.

2. Watch the video on how Leak Sentry/Leak Guard works to prevent water waste.

1. Video for installing and adjusting the Leak Sentry® fill valve:

If the Leak Sentry/Leak Guard fill valve does not allow for the water to refill the tank, we suggest removing some slack from the chain.

Please follow these instructions for getting the correct chain tension:

  1. Turn off water and empty tank by flushing.
  2. Lift tank lever all the way up inside tank and hold it there.
  3. Pull Leak Sentry/Leak Guard chain until it lifts the float cup all the way up the fill valve shaft.
  4. Connect chain & clip with no slack in chain to the tank lever (See Diagram below)

leak_sentry

2. How Leak Sentry/Leak Guard works to prevent water waste .

Watch this video:

3. To watch how to connect the chain of the Leak Sentry® fill valve, please click here:

To download our free guide to fix common toilet problems please click here: Fluidmaster Toilet Repair Guide

News

< Back to News

Solutions for too much water in the toilet bowl

Fluidmaster fill valves are UPC (Universal Plumbing Code) certified and are designed to dispense water through the refill tube to the overflow pipe. This refill supplies water to the bowl during the filling cycle and is used to refill the water spot that is needed for the next flush. Fluidmaster uses a Roller Clamp device to control water going into the toilet bowl

Read below if you want information on:

1. How to check if the toilet bowl is overfilling with water or to adjust the Roller Clamp.

2. Toilets that do not require refill water into the bowl.

1. Toilet Bowl Test: Check bowl water level by flushing toilet. If bowl appears to be full but continues to fill, the valve may be overfilling the bowl causing excess water to siphon down the trap way. Adjust the amount of water going into the bowl by using these steps:

  1. Fill the bowl with a gallon of water. Wait 1 minute until the bowl water level recedes down and stops.
  2. With a pencil, draw a line at the top of the water level in bowl. Now flush the toilet.
  3. If the valve is still filling and the water is up to the line in the bowl, then the amount of water going into the bowl is too high and needs to be adjusted.

Adjusting the Roller Clamp: Watch this video

Or follow these instructions for adjusting the Roller Clamp:

  1. Adjust the Roller Clamp by pushing down and rolling the pin forward.
  2. Engaging the Rolling Clamp restricts the flow of water to the bowl. Repeat this action until the toilet bowl fills to your pencil mark at approximately the same time the tank water turns off.
  3. The “0” setting means that you have completely turned off the refill hose and no water is filling the toilet bowl.

2. Non-Required refill toilets: For toilets that do not require refill water to the bowl, Fluidmaster recommends using our model 215 Water Savings Roller Clamp with Refill Tube that comes with Hose Clamps.

If you do not have a Roller Clamp device, redirect the refill tube to the overflow pipe so that the water flows back into the tank.

CAUTION: If you do not have Hose Clamps on your refill tube, do not squeeze the tube shut completely. This will cause the refill hose to blow off from fill or flush valve connection.

To download our free guide to fix common toilet problems please click here: Fluidmaster Toilet Repair Guide

News

< Back to News

Choosing the right flapper for your toilet

Selecting the right flapper for your toilet is very important since the flapper valve is what regulates the water to the bowl. Fluidmaster has developed a universal design set of flappers to help stop the confusion and select the right flapper. The flapper valves we offer are categorized by Frame, Size and Type.

If you are unsure what size of flapper you will need for your toilet, please click here: Determine size of flapper

Read below to learn more about:

1. Frame: Two styles of flappers

2. Size: The actual size of the flapper ball and which size of drain it will seal properly.

3. Type: The flushing capacity, which is the amount of water used to flush the toilet bowl, that the toilet was designed to use.

4. Keys to selecting a flapper

5. Fluidmaster flappers available

1. Frames: Fluidmaster currently has two styles of flappers

  1. Flexible Frame (All- Rubber): These flappers will fit most Flush Valve Drains and the all rubber-style flappers can stretch to fit oddly sized flush valves, angled seated flush valves and flush valves that do not have mounting posts for a fixed attachment.
  2. Solid Frame (Hard Plastic Frame): The plastic frame forces the flapper ball to consistently center onto the drain to seal every time. Solid Framed Flappers are designed to stop toilets from leaking for longer periods of time. This flapper style does not work with all Flush Valve Drains; however, the key to using this one is to know what you are currently using. There is a good chance that if you are using a plastic framed flapper already then the Solid Frame can be used as a replacement.

2. Size: Currently Fluidmaster offers two sizes of flappers for the two most common size Flush Valve Drains, 2-inch drains and 3-inch drains.

  1. 2-inch flappers are available in both styles: Flexible and Solid Frame.
  2. 3-inch flappers are only available in the Solid Frame style.

3. Types: There are two types of flappers, Adjustable Flappers and Non-Adjustable Flappers, and these flappers are designed for specific flushing capacities of toilets. There are 4 main toilet flushing capacities that are commonly used in the United States today; 5 gallon per flush and larger; 3.5 gallon per flush; 1.6 gallon per flush and 1.28 gallon per flush toilets.

  1. Toilets that are manufactured from 1994 to present come in both styles and in both size categories; Adjustable flappers are designed to flush toilets that flush 1.28 and 1.6 gallon per flush (GPF) toilets.
  2. Toilets that were manufactured before 1994 are all considered to be the larger gallon per flush toilets and are still in use. Non-Adjustable Flappers are designed to flush toilets that flush 3.5, 5 and larger gallon per flush (GPF) toilets. Non Adjustable Flappers come in both Styles but only in 1 size category, 2-inch.

To learn more about your toilet’s flush volume, please click here:

Determining your toilet type

4. Keys to understanding how to select a flapper can be as easy as:

  1. Know the age of your toilet (if you don’t know, guess the age of the home).
  2. Know if the flapper has a Solid Frame or if it’s a Flexible Frame.
  3. Know the size of your flapper, 2- or 3-inch (measuring the drain hole your flapper covers will tell you the size you need).

5. If you need a 2″ toilet flapper, we recommend the 502 toilet flapper

If you need a 3″ toilet flapper, we recommend either the 513A toilet flapper or the 5403 toilet flapper

Here are some examples of the Fluidmaster flappers available.

flappers1

For more available Flappers click here

To download our free guide to fix common toilet problems please click here: Fluidmaster Toilet Repair Guide

News

< Back to News

Instructions / FAQ'S on Click Seal Supply Lines

Fluidmaster Toilet water supply connectors are built with a tough polymer core and covered with a braided stainless steel wire. These connectors exceed every code requirement in the book for durability.

Fluidmaster’s new CLICK SEAL® technology prevents over-tightening which can result in the connector breaking; leading to floods and property damage. The Click Seal® Connector clicks at its maximum torque, letting the consumer know the connector is sealed.

Read more for information on:

1. Installation instructions or to watch installation videos for the Fluidmaster Click Seal Toilet Connector or Click Seal® Faucet Connector:

2. Important Frequently Asked Questions about Click Seal Connectors

1. Installation Instructions

  1. Turn off water supply at shutoff valve.
  2. Remove old supply connector and clean all connector threads.
  3. Thread the metal nut onto the shutoff valve and tighten (1/2) turns beyond hand-tight.
  4. Prior to threading plastic nut onto fill valve shank, turn Click Seal nut counter-clockwise until threads align. Gently turn Click Seal nut clockwise and hand tighten until nut clicks. The “click” lets you know it’s sealed!
  5. Slowly turn on water at the shutoff valve.
  6. Carefully check for leaks at shutoff valve. If leak appears, tighten nut just enough to provide a leak-free joint. Do not over tighten shut off valve.

For toilets, we recommend the Click Seal toilet water supply line and for faucets we recommend the Click Seal faucet water supply line.

You can watch this helpful installation video:

Click Seal Toilet Connector:

2. Frequently Asked Questions (FAQs):

What is the strength of the toilet connector?
(Burst) Strength: Up to 1500 PSI Torque Rating: 15-20 in-lbs

Is the Click Seal® Connector Lead Free?
Yes, the Click Seal® Connector is Lead Free and contains a weighted average lead content of ≤ 0.25%.

Why does my connector click when trying to remove it?
The Click Seal® Connector will only click in the direction it is tightened. If the connector clicks when twisting, you are twisting it the wrong way. Twist the connector in the opposite direction to remove.

Do I need tools to install the Click Seal® Connector?
You will only need an adjustable wrench to snug the metal nut that connects to the shut-off valve or angle-stop valve. No tools are required to tighten the Click Seal® Connector nut.

To download our free guide to fix common toilet problems please click here: Fluidmaster Toilet Repair Guide

News

< Back to News

Prevent flooding - Ensure proper adjustment

This article will explain the importance of both the flush valve and fill valve, along with a diagram showing the placement and height requirements needed to build a safe toilet.

The Importance of the Flush Valve

The most important safety feature in a toilet is the flush valve overflow pipe.

  1. The overflow pipe is critical because it is a defense against water exiting the toilet tank.
  2. Plumbing codes require toilets to be equipped with overflow protection of sufficient size to prevent tank flooding at the maximum rate at which the tank is supplied with water under normal operating conditions.
  3. In the event the toilet fill valve does not completely shut off at the end of a flush cycle, the overflow pipe is designed to transfer the water from the toilet tank to the toilet bowl and out the drain line.
  4. Preventing water from exiting the tank can beachieved through proper height adjustment of the overflow pipe.
  5. Fluidmaster instructs setting the height of the overflow pipe at least 1 inch below the opening of the tank lever.
  6. In most applications it will be necessary to cut the overflow pipe to achieve a proper fit.

The Importance of the Fill Valve

  1. Proper height of the fill valve in relation to the overflow pipe will ensure the toilet cannot siphon water from the tank back into the water supply.
  2. Proper fill valve height also allows for proper water level in the tank and bowl.
  3. Critical Level Mark (Indicated with the letters CL on the fill valve) of the fill valve must be 1 inch above the top of the overflow pipe.
  4. When the fill valve height is set correctly it is possible for the top of the valve to be positioned above the rim of the tank.
  5. This is normal in most applications and will still allow the tank lid to fit properly on the toilet tank.

Placement and Height Requirements Needed for a Safe Toilet

build_safe_toilet

To download our free guide to fix common toilet problems please click here: Fluidmaster Toilet Repair Guide

News

< Back to News

Easy and effective ways to keep your toilet bowl clean

“I didn’t know my toilet could look this good without scrubbing”….says an independent review of Flush ‘n Sparkle on Architectural Digest

We know that keeping your toilet clean is important not just for aesthetics, but also for maintaining a healthy home. That’s why we’re excited to share with you an easy and effective way to keep your toilet bowl clean.

First off, let’s talk about why it’s so important to keep your toilet bowl clean. Over time, mineral buildup and bacteria can accumulate, leading to unpleasant odors, stains, and even potential health risks. One of the most effective ways to keep your toilet bowl clean is by using a quality toilet cleaner. Fluidmaster’s Flush ‘n Sparkle™ cleaning system is a great option, as it provides a powerful cleaning solution with every flush. Simply replace your traditional toilet bowl cleaner with the Flush ‘n Sparkle™ system and let it do the work for you.

Unlike drop-in bleach tablets, Flush ‘n Sparkle™ does not fill up the toilet tank with bleach as it is kept in a reservoir and hence does not destroy the toilet parts. The bleach from Flush ‘n Sparkle™ goes directly into the bowl keeping it sparkling clean. Now you can protect your flapper and other toilet parts by switching to Flush ‘n Sparkle™ that gives you scrub-free, hands-free cleaning up to 3 months.

Jeff from Home Repair Tutor explains in this video why Flush ‘n Sparkle™ is the best option for you when it comes to keeping your toilet bowl sparkling!

For more detailed information as to why Flush ‘n Sparkle™ is the best automatic cleaner for your toilet, please click here: FAQs on Flush ‘ Sparkle

Read below to:

1. See how it works, watch a video or download instructions.

2. Learn about the different cleaners available 

3. Learn about the dangers of chlorine cleaners inside your tank.

1. How Flush ‘n Sparkle Works

The Flush ‘n Sparkle™ system hangs inside the tank and feeds chlorinated water directly down the overflow pipe and into the toilet bowl, eliminating any prolonged exposure to chlorine that causes decay.

If you are thinking that there are similar products out there, get this; unlike similar products, the Flush ‘n Sparkle™ system’s patented design traps the back-flow of chlorine gasses that could damage the fill valve. This patented design eliminates the off-gassing issue and keeps your toilet components safe.

Watch the video:

Download the installation instructions
bowl_clean
2. Different cleaners 

The Flush ‘n Sparkle™ system comes in these varieties:  

Flush ’n Sparkle™ with both bleach and blue cleaning power (model 8400M-5000

Flush ’n Sparkle™ with bleach cleaning power (model 8300)
Flush ’n Sparkle™ 2-pack Refills (model 8302) and 4-pack refills (model 8302W-5004)

  1. Fights stains and bleaches the bowl automatically.
  2. Leaves toilet bowl crystal clear with every flush.
  3. Uses model 8302 replacement cartridges.

Flush ’n Sparkle™ with blue cleaning formula (model 8100)
Flush ’n Sparkle™ 2-pack Refills (model 8102) and 4-pack refills (model 8102B-5003)

  1. Surfactant-based cleaning agent repels stains and fights hard water build-up.
  2. Can also be used for septic tanks.
  3. Toilet water remains blue.
  4. Uses model 8102 replacement cartridges.

Flush ’n Sparkle™ Refills (model 8202) with BioBalance™ for septic tank care 

  1. Releases enzymes with every flush for continuous bioaction.
  2. Measured doses efficiently reduce drain field clogging (no slug dosing).
  3. Cleans toilet bowl and fights hard water build-up.
  4. Uses model 8202 replacement cartridges.

All three Flush-n-Sparkle™ systems provide the following benefits:

  1. Cleans the bowl without damaging tank parts.
  2. Treated water is injected only to the bowl where it’s needed.
  3. Easy to install, fits most two piece toilets.
  4. Cartridges last up to 3 months and are simple to replace.
  5. Dispenser carries a five year warranty.

3. Dangers of Chlorine Cleaners

The danger of drop-in tablets is called off-gassing. As the tablets disintegrate, Chlorine gasses collect in the tank below the lid. Chlorine gas is highly corrosive and can weaken the tensile strength of the fill valve and other tank components that sit above the water line. Off-gassing can lead to severe external leaks and potential property damage as well.

For more detailed information as to why Flush ‘n Sparkle™ is the best automatic cleaner for your toilet, please click here: FAQs on Flush ‘ Sparkle

Ready to give Flush-n-Sparkle™ a try? If yes, please click here: Flush-n-Sparkle™

To download our free guide to fix common toilet problems please click here: Fluidmaster Toilet Repair Guide

News

< Back to News

Identifying all the parts in a toilet tank

Fluidmaster makes it easy for you to identify toilet parts in the tank so you can identify any problems and fix the issue. 

Here is a diagram of a toilet tank with all of its major components and Fluidmaster parts identified for you.

NOTE: Some tanks may have unique fill and flushing systems installed.


To download our free guide to fix common toilet problems please click here: Fluidmaster Toilet Repair Guide

News

< Back to News

How to use wax when installing a toilet bowl

This article will cover the step-by-step installation of a wax gasket for your toilet bowl.

Step 1. Clean surfaces on underside of toilet bowl and floor flange of old wax and debris.
use_wax1

Step 2. Remove old floor bolts, and place new bolts secure with the retainer washer. The wax ring is in place here to show the black plastic flange facing downward on the floor flange.

use_wax2

Step 3. Press wax ring on bowl outlet with plastic flange pointing away from the bowl.
use_wax3

Step 4. Set bowl in place and use body weight to compress wax. Twist bowl slightly to spread wax.

Step 5. Place bolt cover washer and metal washer then acorn nut on bolt. DO NOT OVER-TIGHTEN BOLT NUTS. Tighten nut carefully to prevent breaking the bowl. Use a hacksaw blade to cut bolt ¼” above the acorn nut.
use_wax4

Step 6. File burrs on nut then place bolt cap on bolt.
use_wax5

Step 7. Place bolt cap on top of bolt and snap onto bolt cover washer.
use_wax6

To download our free guide to fix common toilet problems please click here: Fluidmaster Toilet Repair Guide

News

< Back to News

Installing / resolving leaks at the tank bolts

Installing the tank bolts can be done in a variety of ways. Each professional has their own preference as to how this should be accomplished.

Read more for Fluidmaster’s recommended installation and to see a diagram of the recommended installation.

Recommended order of sealing and installing a tank to bowl toilet bolt:

  1. Bolt Head
  2. Rubber Washer
  3. Toilet Tank
  4. Metal Washer (Optional, use only if there is a gap between the tank and the bowl)
  5. Thin Metal Hex Nut (Optional, use only if there is a gap between the tank and the bowl)
  6. Toilet Bowl
  7. Rubber Washer
  8. Metal Washer
  9. Metal Hex Nut

DO NOT use a metal washer directly under the bolt head inside the tank as this will cause a leak.

For Kohler 3-bolt tanks, Fluidmaster recommends that you use Kohler’s triangular tank to bowl gasket and bolt kit.

Recommended Installation Diagram

tank_bolts

DO NOT use a metal washer directly under the bolt head inside the tank, as this will cause a leak.

For Kohler 3-bolt tanks, Fluidmaster recommends that you use Kohler’s triangular tank to bowl gasket and bolt kit.

To download our free guide to fix common toilet problems please click here: Fluidmaster Toilet Repair Guide

News

< Back to News

Choosing and installing the best toilet tank flush handle for your toilet

Fluidmaster’s Premium Tank Lever System is multi-faceted and can be installed in more toilets than any other brand on the market. Its durable tank lever arm is highly adaptable and can be adjusted to fit Front, Angle and Side mount toilets.

In addition to its highly durable arm, the Premium Tank Lever system has a variety of seven luxurious solid metal interchangeable levers to choose from to match your bathroom décor; Traditional, Classic and Contemporary styles in Chrome, Brushed Nickel and Oil Rubbed Bronze.

This article will discuss how the toilet handle works with your toilet and let you see our toilet handles and questions concerning Mansfield toilets.

How is the Premium Tank Lever adjusted to fit my toilet?

The lever arm can be inserted into the mounting base at multiple orientations and degrees to achieve the correct lift. Its adjustable arm allows it to be installed in side mount; angle mount and front mount toilets.

tank_flush_handle1

Click here to download instructions.

Fluidmaster Toilet Handles

tank_flush_handle2

Will the Premium Tank Lever work with my Mansfield tower flush valve?

    Yes! The Premium tank lever in conjunction with Fluidmaster’s 5104 Flapper Chain can be used in the Mansfield toilet that is equipped with a tower style flush valve.

Watch the Installation Video:


Click here to download instructions.

For information on the 5104 Flapper chain Click here :

To download our free guide to fix common toilet problems please click here: Fluidmaster Toilet Repair Guide

News

< Back to News

How to identify and fix toilet flapper leaks

This article will help you repair and find a leak in your tank.

Read below if you:

1. Have a brass flush valve

2. Have a plastic flush valve

3. Need tips on inspecting your flapper

4. Need instructions on finding a slow leak

5. Need a diagram of leak points within a toilet tank

6. Need to know what “Ghost Flushing” is

7. Need to know what “Siphoning” is

1. Brass Flush Valve

  1. Check the flush valve seat for corrosion or unevenness. Move your finger around the seat rim to check for irregularities or nicks. If there are any irregularities on the flush valve seat, then you will need to replace the flush valve.
  2. If your brass overflow pipe requires a flapper adapter ring to connect your flapper to the overflow pipe make sure the pipe adapter is square to the drain.
  3. If you are using a flapper pipe adaptor to hold your flapper to the flush valve turn the pipe adapter to the left or right to center the flapper over the drain hole. If the back half of the flapper has a gap between the rubber and the seat Fluidmaster recommends exchanging the flapper with our Flexible Frame Flapper models (503, 504 or 5051).
  4. Some brass overflow pipes are threaded at the bottom. This is a potential leak location that can be tightened by turning it. If the pipe has pin holes or corrosion in this area, replace the brass overflow pipe.
  5. Some flush valves that have oval overflow pipes or have an angled seat may not accommodate rigid frame flappers. In this case, use an Flexible Frame models 503*, 504* and 5051*.

*Note: The Fluidmaster flappers # 503* and # 504* are for toilets manufactured before 1994.

*Note: The 5051 flapper is for a toilet manufactured after 1994.

2. Plastic Flush Valve

  1. Check the flush valve seat for corrosion or unevenness. Move your finger around the seat rim to check for irregularities or nicks. If there are any irregularities on the flush valve seat, you will need to replace or repair the flush valve.
  2. If you are using a flapper pipe adaptor to hold your flapper to the flush valve turn the pipe adapter to the left or right to center the flapper over the drain hole. If the back half of the flapper has a gap between the rubber and the seat Fluidmaster recommends exchanging the flapper with our Flexible Frame Flapper models 503*, 504* or 5051*.
  3. Some flush valves that have oval overflow pipes or have an angled seat may not accommodate rigid frame flappers. In this case, use an Flexible Frame models 503*, 504* and 5051*.

*Note: The Fluidmaster flappers # 503 and # 504 are for toilets manufactured before 1994. The 5051 flapper is for a toilet manufactured after 1994.

3. Inspecting the flapper

  1. If the flapper is more than 5 years old, simply change it. The time saved will outweigh the cost of fussing with an aged flapper.
  2. If the flapper is less than 5 years old, check the rubber surface for debris. Wipe slime and/or debris from the underside and flush valve seat with a clean cloth.
  3. Cut excess chain if it is interfering with the seating of the flapper. Makes sure the chain is not too straight. It may lift the flapper from the seat. Have 1/4″to 1/2″ slack in chain.
  4. If the flat rubber piece is warped then replace it. If you use chlorine tablets in the tank this would be the cause of the warping.
  5. Remove the tablet (it damages parts in the tank) and replace with 8300 Flush ‘n Sparkle Bleach Kit.

Please refer to Fluidmaster warning: DO NOT USE IN-TANK DROP-IN TOILET BOWL CLEANERS CONTAINING BLEACH OR CHLORINE.

Use of such products will: (1) RESULT IN DAMAGE to tank components and MAY CAUSE FLOODING and PROPERTY DAMAGE and (2) VOID FLUIDMASTER WARRANTY.

Fluidmaster Flush ‘n Sparkle Toilet Bowl Cleaning System is recommended for those choosing to use in-tank bowl cleaners and WILL NOT VOID the FLUIDMASTER WARRANTY because it will not damage the components.

4. Finding a slow leak (Instructions)

Die tablets or food coloring can be used in a tank to confirm they have a leak. This is great for verifying a faster leak but it does not always verify a slow leak and does not confirm where the leak is occurring. The best troubleshooting procedure for determining the leak point is as follows:

  1. With a full tank, turn the water off at the shut of valve. DO NOT flush the toilet.
  2. Make a pencil mark in the tank at the current water level.
  3. Wait 15 minutes. If the water level has dropped, make a new pencil mark. If it hasn’t changed significantly wait a little longer.
  4. Repeat step C until the water level no longer changes.
  5. Inspect the flush valve for a leak point just above the surface of the water.

Results:

  • The water level will drop down to the level of the leak and stop.
  • If the flapper is worn or the seat that the flapper rests on is damaged, the water level will stop just below the flapper.
  • If the gasket that seals the flush valve into the tank is deteriorated and leaking, the water would most likely drain completely out of the tank.
  • If a leak occurs at a flush valve gasket in new installations, the lock nut may need to be tightened further. The flush valve lock nut should be tightened no more than 1/2 turn beyond hand tight.

5. Diagram of leak points within a toilet tank

Take a look at the diagram below, to get the info on the corresponding numbered part.

fix_toilet_flapper_leaks

  1. Tank Lever: Leaking out the handle hole should never happen as long as your overflow pipe (8) is cut or adjusted to the correct height. Fluidmaster recommends 1 inch (or more) below the Tank Lever.
  2. Shank Washer: If you see water leaking from the area of the fill valves shank; shut the water off at the wall. If the leak stops, then replace the supply line. If the leak continues, try tightening the fill valve’s lock nut by hand only. If the leak continues, remove the fill valve and replace the shank washer.
  3. Bolts: Leaks at the bolts are sometimes hard to identify, but most leaks that occur between the tank and bowl are caused by deteriorating bolt gaskets or loose nuts. First, make sure the tank is securely tightened to the bowl so that it does not rock. If there is any movement in the tank, tighten each tank bolts a little at a time until the tank is sturdy and does not rock. Second replace using only Brass Bolts and new bolt washers.
  4. Flush Valve Gasket: Leaks at the flush valve gasket are usually not visible and almost always leaks into the bowl. Although, if both the flush valve gasket and tank to bowl gasket are failing to create a tight seal then it is possible you would see it leak out onto the floor. Replacing the flush valve and gaskets are recommended.
  5. Flapper or Flush Valve Seal: Flapper leaks are the most common leak point and always leaks directly into the bowl. Tower or canister style flush valves will have a flat seal in place of a traditional flapper.
  6. Refill Tube: Water dripping from the refill tube into the overflow pipe could be caused by siphoning. Siphoning occurs when the refill tube is pushed too far into the flush valves overflow pipe.
  7. Flush Valve Joints: Leaks can also occur at the joints (plastic flush valves) or threaded joints (brass flush valves).
  8. Overflow Pipe: Cracks in the plastic overflow pipes are not uncommon as after time the plastic can become brittle.
  9. Tank: Cracks or chips in the tank are another cause of leaks.

6. Ghost Flushing

Ghost Flushing is merely a fill valve’s way of letting you know you have water leaking out of your tank. The time interval between ghost flushes will vary as the leak rate increases or decreases.

For example, the most common leak is a flapper leak. The time duration between refills could be seconds apart or minutes apart depending on the severity of the leak.

On the other hand, a flush valve gasket leak is much slower and the ghost flushing can occur hours apart or even days apart.

7. Siphoning

Siphoning occurs when the refill tube is pushed too far into the flush valves overflow pipe.

If the end of the tube is inserted into the overflow pipe and the end of the tube is lower than the water level inside the tank, water will siphon out of the tank and into the bowl.

This will cause the water level in the tank to drop and a Ghost Flush will occur.

Make sure the refill tube is connected to the top of the flush valves overflow pipe so that it is above the water line at all times.

To download our free guide to fix common toilet problems please click here: Fluidmaster Toilet Repair Guide

News

< Back to News

Solutions for a toilet making refill sounds on its own or ghost flushing

Sometimes you can hear a toilet refilling without being flushed. This sound can happen intermittently and occur every few minutes or every few hours. Such a refill sound is usually alerting you that your toilet is losing water, either internally (if there’s no water on the floor or exterior of toilet) or externally leaking if you see water outside the toilet.

Read below if:

1. Your toilet has internal leaks

2. Your toilet has external leaks

1. Here are some solutions for internal leaks (water draining into bowl):

  1. Check refill tube first: If refill tube is inserted too far into the overflow pipe, pull it out and reattach to outside of overflow pipe. This should keep the tube from entering the overflow pipe and often stop an internal leak from the tank to bowl and prevent “ghost flushing”.
  2. Inspect flapper for visible damage/debris: Wipe flapper and surface area of flush valve clean. Replace flapper if this does not resolve toilet running. If you are unsure which size of flapper you need, please click here: Determine size of toilet flapper
  3. To replace a 2″ toilet flapper, we recommend the 502 flapper; to replace a 3″ toilet flapper, we recommend the 5403 flapper.
  4. Replace entire flush valve if steps a and b do not resolve issue. We recommend the K-507A-008 for a 2″ toilet and the 540AKR for a 3″ toilet.

If you need to replace any of the toilet parts, why not get Fluidmaster’s Everything Kit includes everything you need to fix your toilet in one purchase?

If you are in the U.S. and have a 2″ flush valve toilet, we recommend the 2″ Everything Kit

If you are in the U.S. and have a 3″ flush valve toilet, we recommend the 3″ Everything Kit

If you are in Canada and have a 2″ flush valve toilet, we recommend the 2″ Everything Kit

If you are in Canada and have a 3″ flush valve toilet, we recommend both the 540AKR Flush Valve and the 400H Fill Valve

2. Here are some solutions for water visible outside toilet:

Water visible to rear of toilet is most likely coming from the bottom of the fill valve, the water supply line or the seals between the tank and the bowl (in 2 piece toilets).

  1. Water dripping from bottom of the tank: Observe and ensure the fill valve locknut, located under the tank, is tight against the ceramic tank. If necessary, remove fill valve and clean bottom of tank (both inside and outside) ensuring shank washer is placed on the fill valve first before inserting valve through hole in ceramic (it is designed to seal the tank from the inside the tank). Reinstall existing valve or replace with new one. Hand tighten the fill valve lock nut.
  2. Observe water supply line for visible leaks. It is always a good idea to replace the water supply line if it’s older than 5 years.
  3. Leaks coming from under the tank onto the toilet bowl or down back of toilet base usually indicate failed tank to bowl seals, either at the bolts or on the center drain. The tank to bowl gasket and toilet bolts with washers should be replaced.

Here is a short video on how to fix ghost flushing:

To download our free guide to fix common toilet problems please click here: Fluidmaster Toilet Repair Guide

News

< Back to News

How to fix common problems with a Fluidmaster 400CARP PerforMAX® No Tank Removal Kit

The 400CARP PerforMAX® No Tank Removal Kit fixes most common toilet problems while reducing repair time by 30 minutes. It features the PerforMAX® toilet fill valve which is one of the quietest and most efficient solutions to fix and upgrade your toilet. Also featured is the PerforMAX® 2” flush valve repair kit that fixes common flush valve problems while giving the user the capability to optimize toilet performance while saving water and money. This kit works with most toilets with 2” flush valves including Kohler®, Toto® and American Standard®, and many more. Read more below.

Watch an installation video on the Fluidmaster 400CARP PerforMAX® No Tank Removal Kit

400CARP PerforMAX® No Tank Removal Kit

The PerforMAX® fill valve has a built-in flow regulator that allows for a quiet fill. Its adjustable toilet bowl refill rate allows the customer to optimize their water and money savings. It also offers a high enough toilet bowl refill rate to accommodate the high refill requirements of all 1.6 GPF toilets and 1.28 GPF High Efficiency Toilets (HET). In turn, allowing the toilet bowl to refill to its proper water level and maintain a powerful and complete flush.

Fix a deteriorated or damaged flush valve seat without dealing with any messy glue or removing the tank with the Flush Valve Repair Kit. It’s easy to install and it includes the Universal PerforMAX® High Performance Flapper that can be installed into more toilets than any other leading brand. Its adjustable feature allows it to be used in 1.28, 1.6 and 3.5+ gallon per flush toilets. Its reliable solid frame does not twist and provides the best seal. Only Fluidmaster has toilet flappers with built-in Microban® protection. The Microban® protection keeps the flapper cleaner by fighting flapper breakdown due to bacteria on the flapper itself.

For further information on where to buy this product or detailed installation instructions click here.

400CARP PerforMAX® No Tank Removal Kit

Frequently Asked Questions

  • Why doesn’t my sealant ring stick?
    The flush valve seat may not have been prepared properly. Make sure you have properly cleaned and thoroughly dried the flush valve seat before installing the sealant ring. It is very important that the sealant ring not come into contact with water prior to seating the sealant onto the drain or porcelain seat. If the sealant ring has been in use for a period of 5 years or longer and comes loose, replacement sealant rings are available to purchase. See Fluidmaster model 2602 on our website here.
  • How do I adjust my PerforMAX® flapper to save water and still achieve a powerful flush?
    The PerforMAX® flapper is a dial. By rotating the flapper within its rigid frame you can allow the flapper to close sooner or stay open longer. For more water savings, dial the flapper down to a lower setting. If the flush is weak, set the dial to a higher number.
  • Can I replace the flapper without replacing the entire Flush Valve Repair Kit?
    Yes, the PerforMAX® flapper is sold separately. It is Fluidmaster model 502, click here.
  • Is the PerforMAX® fill valve also sold separately?
    Yes, the PerforMAX® Fill Valve, model 400AH is sold separately. For information on where to buy click here.
  • Can the PerforMAX® Fill Valve be repaired?
    Yes, repair parts are available. For a list of repair parts and where to purchase them, click here.
  • Will this kit fit my toilet?
    This kit is designed to work with most 2 piece toilets with 2” flush valves. There are select one-piece toilets it will work in as well, but it will not fit low profile one piece toilets or toilets with 3” flush valves or canister style flush valves.

To download our free guide to fix common toilet problems please click here: Fluidmaster Toilet Repair Guide

News

< Back to News

Determining your toilet's noise and how to fix it

This article on toilet making noise defines simple solutions for:

1. GHOST FLUSHING: This can happen intermittently, cycling every few minutes or every few hours

2. FILL VALVE HISS: A noise that is constant and sounds like forced air moving through the toilet.

3. WATER RESONANCE: (constant thumping) A noise you hear when the toilet is flushed and the toilet is running water during its flush cycle

1. GHOST FLUSHING:
This refill sound is alerting you that your toilet is losing water, either internally (if there’s no water on the floor or exterior of toilet) or externally leaking if you see water outside the toilet.

Internal Water Loss:

  1. Check refill tube first: If refill tube is inserted or shoved into the overflow pipe, remove it and reattach clipping the tube to the overflow pipe. This will keep the tube from entering the overflow pipe and stop the leak.
  2. Clean bottom of the tank and flapper area and replace flapper. To determine which size flapper you need, please click here: Determine size of toilet flapper.
    If you need a 2″ flapper, we recommend the 502 flapper; if you need a 3 ” flapper, we recommend either the 513A flapper or the 5403 flapper
  3. Replace flush valve drain (last resort if 1  and 2 do not resolve the issue).

External Water Loss:

  1. Water draining from bottom of tank around fill valve and water supply connection: Leaks coming from the bottom of the fill valve that have been in use for a long period of time (not new installations) should be removed along with the supply line and replaced.
  2. Water draining from the bottom of the tank from the fill valve and water supply connection: Remove fill valve and clean bottom of tank both inside and outside. Make sure the shank washer is placed on fill valve first (it is designed to seal tank from the inside of tank) and install valve. Hand tighten the fill valve lock nut. If using water supply line older than 5 years replace supply line.
  3. Leaks coming from under the tank onto the toilet bowl: These leaks indicate failed bolt seals. The tank to bowl gasket and toilet bolts with washers should be replaced.

Watch this video to fix ghost flushing of your toilet:

2. FILL VALVE HISS:
This noise is alerting you that water is constantly passing through the fill valve and going into the tank.
Read more below or or watch this video:

Here are some steps for removing the top cap and flushing out debris from the fill valve:

  1. Turn off water supply and flush the tank.
  2. Reach inside the tank with your right hand under the float cup and lift it up. With your right hand hold onto the gray shaft keeping the float cup all the way up. Do not allow the float cup to drop or valve shaft to turn.
  3. Place your left hand on the top of the valve cap and while placing your left hand thumb on the side of the arm coming out of the top. Turn the cap and arm counter clockwise 1/8th of a turn to unlock. You should be able to lift off the cap and lever from the valve body.
  4. Once the cap assembly has been removed inspect for debris on the seal (rubber disc with pin coming through) and also the valve portion still in the tank.
  5. Hold a cup upside down over the exposed opening of the valve and turn on the water supply full force for 10-15 seconds, allowing the pressure to free any debris inside the valve inlet.
  6. Reassemble the top of the valve by placing the cap arm next to the refill tube. To lock, press the cap down while turning it and the arm clockwise.
    determine_article_photo
  7. The bottom hand is lifting up on the float cup which raises the black arm under the top cap. The top hand is gripping the cap while the thumb is pressing on the raised lever arm.

Watch this video on how to remove and replace cap assembly of the fill valve:

3. WATER RESONANCE:
This noise is alerting you that your shut off valve at the wall has an obstruction in the flow path of the water. Here are some solutions:

a). If you are based in the U.S., we recommend using a regulated fill valve to stop noise like our 400AH PerforMAX® Fill Valve or the 400H PerforMAX® Toilet Fill Valve

If you are based in Canada, we recommend using the 400H PerforMAX Toilet Fill Valve

PerforMAX® fill valves come with a regulator built into the valve to slow down the incoming water. By reducing the speed by the incoming water we can stop the resonance noise that is       occurring.

b). If a PerforMAX® Fill Valve does not stop the problem then the buildup of debris in your shut off valve is so severe we recommend replacing the shut off valve at the wall.

c). If you need to replace any of the toilet parts, why not get Fluidmaster’s Everything Kit includes everything you need to fix your toilet in one purchase?

If you are in the U.S. and have a 2″ flush valve toilet, we recommend the 2″ Everything Kit

If you are in the U.S. and have a 3″ flush valve toilet, we recommend the 3″ Everything Kit

If you are in Canada and have a 2″ flush valve toilet, we recommend the 2″ Everything Kit

If you are in Canada and have a 3″ flush valve toilet, we recommend both the 540AKR Flush Valve and the 400H Fill Valve

To download our free guide to fix common toilet problems please click here: Fluidmaster Toilet Repair Guide

News

< Back to News

How "Adjustable" toilet flappers work

This article will address both how adjustable flappers work and instructions for adjusting an adjustable flapper.

How Adjustable Flappers Work

  1. Traditional flappers use air to hold the flappers open, adjustable flappers don’t allow the flapper to trap or hold air inside their cone/bulb.
  2. Adjustable flappers are designed to flush toilets that use a flush volume of 1.28 and 1.6 gallon per flush (GPF)
  3. Adjustable flappers should not be used on toilets made before 1994.
  4. Adjustable flappers may use a float to delay the flapper from closing right away.
  5. Adjustable flappers may use a dial in place of a float. The dial sets a secondary hole in the flapper cone to release air and force the flapper to close.

If you are unsure, which size of flapper you need for your toilet, please click here: Determine size of flapper

Instructions for Adjusting an Adjustable Flapper

Fluidmaster flappers can be adjusted in three different ways:

  1. Turning the flapper cone from a minimum to maximum setting, so you are moving the secondary hole away from the top of the tank which traps the air in the flapper cone for a longer period of time.
  2. Moving a float (a float is placed on the flapper chain) up the chain, so you are setting the flapper to close faster. By lowering the float on the chain you are causing the flapper to stay open longer.
  3. Pulling slightly on the cone and turning the cone from a minimum to maximum setting, so you are closing the cone window and causing the flapper to stay open longer.

adjustable_flappers

If you need a 2″ adjustable flapper, we recommend the 502 toilet flapper

If you need a 3″ adjustable flapper, we recommend the 5403 toilet flapper

To download our free guide to fix common toilet problems please click here: Fluidmaster Toilet Repair Guide